Python on Linux is downright awkward. If you want to take
advantage of the latest tools and tricks that the scientific Python
community has to offer, that means installing Python packages that
aren't always available in your distribution's package manager. People
recommend using pip, but if you just apt-get install pip and sudo
pip install this that, now you've gummed up apt-get because it
doesn't know about the packages that pip installed.
Grad students under tight deadlines certainly don't want to deal with packaging, dependency hell, and system-breaking upgrades. I'm sick of this.
Luckily, it's not hard to do better.
What if you could keep your own independent version of Python in your home folder? This way, you wouldn't have to worry about breaking your system with experimental packages -- you could just remove the folder to go back. This also lets you separate out each of your projects' dependencies.
You don't have to be a rocket scientist or a UNIX-bearded guru to set this up.
Overview
Here are the steps we'll take. Don't skip any because each one depends on the last. You can skip installing OpenCV if you don't need it though.
Once you're through, you'll have a nice way of keeping packages in your home folder, a custom version of python, a fresh-compiled OpenCV, and everything you need to run ipython notebook.
- Set up your shell for local packages in your home folder so you won't have to worry about your distribution's package manager.
- Compile Python from source, placing it in your home folder
- Set up
virtualenv, which also gives youpip - Install OpenCV
- Install your Scientific Python stack
- Install the IPython notebook
Do not use sudo for any of the instructions below. You don't need it and it will mess your home folder's permissions up.
Local packages
If you only read one section from this article, make it this one.
This step frees you from ever having to worry about apt-get again.
Once you have it set up, you don't have to ask root to install your
favorite packages anymore; you can just compile them yourself and keep
them tucked away in your home folder.
This is wonderful for shared systems, old systems, or when you want to try inspecting/modifying a package's source code. This is the secret sauce that makes local Python work. It's completely distribution-agnostic, it doesn't make invasive changes, and it's easy to go back if you decide you don't want it anymore.
You might already know about $PATH, the environment variable that
lists all the places where your programs live. When you run a command
like ls, the kernel will search your current PATH to find that
command. My $PATH currently has:
gcr@brannigan:~$ echo $PATH
/usr/local/bin:/usr/bin:/bin:/sbin:/usr/sbin:/usr/local/sbin
One great pattern is to keep all of your local programs in a
~/local folder. This way, you can have your own compiled Ruby in
~/local/ruby, a NodeJS in ~/local/node/, and so on. When you type
irb, your shell really runs ~/local/ruby/bin/irb.
Then, your $PATH would have /home/gcr/local/ruby/bin,
/home/gcr/local/python/bin, /home/gcr/local/node/bin/,
/usr/local/bin, /usr/bin, /bin, /sbin, /usr/sbin, and
/usr/local/sbin. Each of your packages would have its own entry in
the PATH.
It's really elegant. This pattern helps with debugging and version
isolation and you can just rm -r ~/local/ruby to cleanly and
completely remove the local ruby with no system-breaking side effects.
Want to switch to another version of node? Just move your node
folder out of the way and compile a different version into its place.
Let's build Python this way. First, create the ~/local folder
that will keep all the packages you install.
Then, add this to the end of your ~/.bashrc:
# Local Installs
# ==============
# This allows you to install programs into $HOME/local/someprogram
# for example, when I install node locally I install it like this:
#
#    ./configure --prefix=$HOME/local/node-v0.8.4
#    make
#    make install
#
# To uninstall a program, just rm -rf $HOME/local/someprogram
#
if [ -d $HOME/local ]; then
    for i in $HOME/local/* $HOME/local/`uname -m`/*; do
        [ -d $i/bin ] && PATH="${i}/bin:${PATH}"
        [ -d $i/sbin ] && PATH="${i}/sbin:${PATH}"
        [ -d $i/include ] && CPATH="${i}/include:${CPATH}"
        [ -d $i/lib ] && LD_LIBRARY_PATH="${i}/lib:${LD_LIBRARY_PATH}"
        [ -d $i/lib ] && LD_RUN_PATH="${i}/lib:${LD_RUN_PATH}"
        # uncomment the following if you use macintosh
        #  [ -d $i/lib ] && DYLD_LIBRARY_PATH="${i}/lib:${DYLD_LIBRARY_PATH}"
        [ -d $i/lib/pkgconfig ] && PKG_CONFIG_PATH="${i}/lib/pkgconfig:${PKG_CONFIG_PATH}"
        [ -d $i/share/man ] && MANPATH="${i}/share/man:${MANPATH}"
    done
    export PATH
    # strip trailing colons
    export LD_LIBRARY_PATH=${LD_LIBRARY_PATH%:}
    export LD_RUN_PATH=${LD_RUN_PATH%:}
    export PKG_CONFIG_PATH=${PKG_CONFIG_PATH%:}
fi
You now have to apply your changes by running source ~/.bashrc
(You should source your bashrc every time you install a package this
way.)
If something breaks or you want to undo all of your work today, just
delete ~/local, remove that part of your ~/.bashrc, and log out.
When you log back in, everything will be the way it was before you
meddled with this article.
Installing python
Now, let's compile our own Python from source.
Head up to http://python.org/download/
and download the latest source code release into /tmp, but make
sure it's Python 2.x and not Python 3.
For instance:
gcr@brannigan:/tmp $ wget 'http://python.org/ftp/python/2.7.5/Python-2.7.5.tar.bz2'
gcr@brannigan:/tmp $ tar xvf Python-2.7.5.tar.bz2
gcr@brannigan:/tmp $ cd Python-2.7.5
Make sure you have all the dependencies: build-essential, autoconf, automake. Don't forget zlib1g-dev (the thing that provides zlib.h) or else Python's zlib package won't work. You also need libssl-dev to download HTTPS packages.
Next, let's compile python into ~/local/i686/python/:
ARCH=`uname -m`
./configure --prefix=$HOME/local/$ARCH/python --enable-shared
make install
If this step gives you any errors, stop here and correct them. You may need to install several development packages to be able to compile Python.
Now you have a new Python, but you have to apply your .bashrc again before you can see it:
gcr@brannigan:/tmp/Python-2.7.5 $ which python
/usr/bin/python
gcr@brannigan:/tmp/Python-2.7.5 $ source ~/.bashrc # THIS is the crucial step
gcr@brannigan:/tmp/Python-2.7.5 $ which python
/home/gcr/local/i686/python/bin/python
At this point, check that you can run python and check that it's
the correct version.
gcr@brannigan:/tmp/Python-2.7.5 $ python
Python 2.7.5 (default, Jul  4 2013, 17:24:09)
>>>
Awesome. Your Python is now installed, and you didn't even need root permission.
Now, whenever you open up a shell, running python will use your new
version. If you want to temporarily start the system-installed
version, run it by calling its full path:
gcr@brannigan:/tmp/Python-2.7.5 $ /usr/bin/python
Python 2.6.6 (r266:84292, Dec 26 2010, 22:31:48)
>>>
Setting up Virtualenv
Virtualenv is useful because it gives us Pip which we can use to install python packages. Virtualenv also helps keep python packages separated if you need it to.
With Virtualenv and Pip, you can install python packages just by
typing pip install scikit-learn. They'll be placed right into your
home folder and you won't have to fuss with apt-get or sudo.
A virtualenv is just a folder. I'm going to keep my virtualenv in
~/local/i686/python/venv, but you can put it somewhere else.
Because we don't want to rely on the system's broken/old virtualenv version, we will again set one up ourselves. Download virtualenv from https://pypi.python.org/pypi/virtualenv and place it in /tmp:
gcr@brannigan:/tmp $ wget https://pypi.python.org/packages/source/v/virtualenv/virtualenv-1.9.1.tar.gz
gcr@brannigan:/tmp $ tar xvf virtualenv-1.9.1.tar.gz
Now, create your first virtualenv somewhere in your home folder. I find that it's best to just put it the same place where I put my Python.
Make sure that you're actually using your new python for this step!
gcr@brannigan:/tmp $ which python
/home/gcr/local/i686/python/bin/python
gcr@brannigan:/tmp $ python virtualenv-1.9.1/virtualenv.py --no-site-packages --distribute -p `which python` ~/local/$ARCH/python/venv
Already using interpreter /home/gcr/local/i686/python/bin/python
New python executable in /home/gcr/local/i686/python/venv/bin/python
Installing distribute...........................................................................................................................................................................................................................done.
Installing pip................done.
This is what things look like before using virtualenv:
gcr@brannigan:/tmp $ which python
/home/gcr/local/i686/python/bin/python
gcr@brannigan:/tmp $ pip
-bash: pip: command not found
We activate the virtual environment, and this is what things should look like now:
gcr@brannigan:/tmp $ source ~/local/$ARCH/python/venv/bin/activate # THE crucial step
gcr@brannigan:/tmp $ which python
/home/gcr/local/i686/python/venv/bin/python
# Note how it's now in your virtualenv!
gcr@brannigan:/tmp $ which pip
/home/gcr/local/x86_64/python/venv/bin/pip
gcr@brannigan:/tmp $ pip
Usage:
  pip <command> [options]

  ...lots of other output...
Note well: Every time you wish to use your new virtualenv (and thus your new pip), you must source the venv-folder/bin/activate script!
Suggestion: Put it at the end of your .bashrc so it happens automatically.
You are now ready to go hog-wild, installing all the Python packages you desire.
Virtualenv and pip are all now set up. If you like, you can use something like virtualenvwrapper (I don't), or you can read up more on how virtualenv and pip can make managing dependencies easier.
Or you can install OpenCV straightaway:
Installing OpenCV
At this point, you should have a working pip. Let's test it by
installing numpy, which is a dependency of OpenCV anyways:
gcr@brannigan:/tmp $ pip install numpy
...
Successfully installed numpy
Cleaning up...
gcr@brannigan:/tmp $ python
Python 2.7.5 (default, Jul  4 2013, 17:24:09)
>>> import numpy
>>> numpy.array([1,2,3])
array([1, 2, 3])
>>>
Now we can install OpenCV proper.
Note that the ~/local package trick works for shared libraries
too, which means that by keeping OpenCV there, you can just compile
any C/C++ file against any arbitrary version of OpenCV that you
like, no matter how messed up the rest of your system's packages are.
This is what we call super convenient.
Head on over to http://opencv.org/downloads.html and grab yourself a
copy of OpenCV's source, again placing it into /tmp:
gcr@brannigan:/tmp $ wget http://downloads.sourceforge.net/project/opencvlibrary/opencv-unix/2.4.6/opencv-2.4.6.tar.gz
gcr@brannigan:/tmp $ tar xvf opencv-2.4.6.tar.gz ; cd opencv-2.4.6
OpenCV uses the CMake build system, so let's just compile it.
Unfortunately, OpenCV requires literally tons of command line options
to make it work inside your virtual environment, so read the code
below before copying it into your terminal. In particular, I'm
assuming that you have Python 2.7 and that your virtualenv is in the
$VENV_FOLDER variable:
mkdir build; cd build
# Change this:
VENV_FOLDER=$HOME/local/$ARCH/python/venv
# Configure OpenCV:
cmake \
  -D PYTHON_PACKAGES_PATH=$VENV_FOLDER/lib/python2.7/site-packages/ \
  -D PYTHON_INCLUDE_DIR=$HOME/local/$ARCH/python/include/python2.7/ \
  -D PYTHON_LIBRARY=$HOME/local/$ARCH/python/lib/libpython2.7.so \
  -D PYTHON_EXECUTABLE=`which python` \
  -D CMAKE_INSTALL_PREFIX=$HOME/local/$ARCH/opencv \
  -D BUILD_NEW_PYTHON_SUPPORT=ON \
  -D BUILD_PYTHON_SUPPORT=ON \
  -D PYTHON_NUMPY_INCLUDE_DIR=`python -c 'import numpy; print numpy.get_include()'` \
  ..
This script generates a lot of output, but the important bit is at the bottom: a checklist of all the features that will be compiled in to your OpenCV library. Here's my ./configure output for comparison.
In particular, note the Python version that OpenCV will compile against:
-- Python:
--     Interpreter: /home/gcr/local/i686/python/venv/bin/python (ver 2.7.5)
--     Libraries: /home/gcr/local/i686/python/lib/libpython2.7.so (ver 2.7.5)
--     numpy: /home/gcr/local/i686/python/venv/lib/python2.7/site-packages/numpy/core/include (ver 1.7.1)
--     packages path: /home/gcr/local/i686/python/venv/lib/python2.7/site-packages
Make sure that all of these paths are inside your home folder! If
any of them begin with /usr, OpenCV won't work.
(Protip: At this point, if you want to build OpenCV with, say,
ffmpeg support, now's the time to compile your own ffmpeg.
Remember: If you compile FFMPEG with ./configure
--prefix=$HOME/local/ffmpeg, it will go straight in your home folder)
Anyways, it's time to compile OpenCV:
gcr@brannigan:/tmp/opencv-2.4.6/build $ make install
...
-- Installing: /home/gcr/local/x86_64/opencv/bin/opencv_performance
-- Set runtime path of "/home/gcr/local/x86_64/opencv/bin/opencv_performance" to "/home/gcr/local/x86_64/opencv/lib"
-- Installing: /home/gcr/local/x86_64/opencv/bin/opencv_traincascade
-- Set runtime path of "/home/gcr/local/x86_64/opencv/bin/opencv_traincascade" to "/home/gcr/local/x86_64/opencv/lib"
Horray! That took a while. Again, re-source your bashrc so you now see your lovely library. Let's test OpenCV:
gcr@brannigan:/tmp/opencv-2.4.6/build $ source ~/.bashrc
gcr@brannigan:/tmp/opencv-2.4.6/build $ python
Python 2.7.5 (default, Jul  4 2013, 16:53:30)
>>> import cv2
>>> import cv
Awesome! OpenCV is now installed.
An aside: Preaching the good news about pkg-config
Did you know about pkg-config?
If you don't, you should.
Let's test our newly-compiled OpenCV library. Here's a small source file that displays a grey rectangle to the screen:
gcr@brannigan:/tmp $ cat > test-ocv.cpp
#include <opencv2/opencv.hpp>

using namespace cv;
int main(){
    Mat img = Mat(250,250, CV_8UC1, 128);
    namedWindow("grey");
    imshow("grey",img);
    waitKey(0);
}
^D
Oh bother, now we have to compile it. Remember those command line options? I bet you don't.
Luckily, pkg-config does! Check this out:
gcr@brannigan:/tmp $ pkg-config --cflags opencv
-I/home/gcr/local/x86_64/opencv/include/opencv -I/home/gcr/local/x86_64/opencv/include
gcr@brannigan:/tmp $ pkg-config --libs opencv
/home/gcr/local/x86_64/opencv/lib/libopencv_calib3d.so /home/gcr/local/x86_64/opencv/lib/libopencv_contrib.so ...
Whether you keep libraries in your home folder or not, pkg-config
knows how to compile them. Use it in your makefiles, use it in your
shell scripts, use it everywhere. You can see a list of packages that
pkg-config knows about by running pkg-config --list-all.
Compiling and running your sample is a snap thanks to pkg-config:
gcr@brannigan:/tmp $ g++ `pkg-config --cflags --libs opencv` test-ocv.cpp -o test-ocv
gcr@brannigan:/tmp $ ./test-ocv
[a grey window appears]
So now your new OpenCV library works.
Note: Did pkg-config find the library in your home folder? If not, you forgot to source your .bashrc:
gcr@brannigan:/tmp/opencv-2.4.6/build $ pkg-config --cflags opencv
-I/usr/local/include/opencv -I/usr/local/include
# that's not right...
gcr@brannigan:/tmp/opencv-2.4.6/build $ . ~/.bashrc
gcr@brannigan:/tmp/opencv-2.4.6/build $ pkg-config --cflags opencv
-I/home/gcr/local/i686/opencv/include/opencv -I/home/gcr/local/i686/opencv/include
# ah, much better
IPython Notebook and the rest of the Scientific Python Stack
You've done most of the hard work. Installing packages is super easy now. Here's a slough of interesting ones:
gcr@brannigan:/tmp $ for pkg in numpy scipy pyzmq tornado cython ipython scikit-image scikit-learn; do pip install $pkg; done
Note that you might need the libblas-dev and liblapack-dev
packages from your distribution's package manager, or you can compile
them yourself just like how we compiled OpenCV. They're like twenty
years old though, so you probably don't have to worry about your
distribution carrying out-of-date versions. (At the time of writing,
BLAS' first release was 34 years ago.)
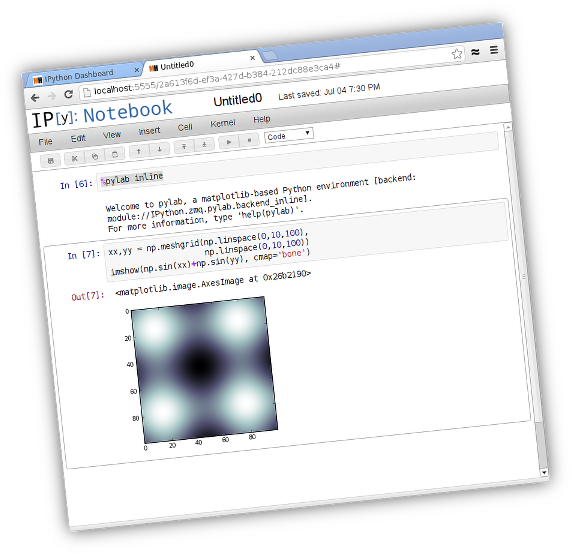
After this, you can now just run ipython notebook and your browser
will pop up, ready for editing!